How to fillet a fish / Leave “silver” on!
Filleting for Sashimi
To slice out sashimi, you need to fillet to quarters for bigger fish, halves for smaller fish.
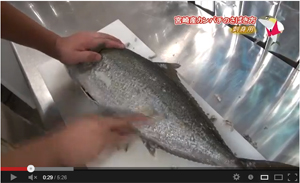
This is a movie of a professional chef cutting an amberjack to quarter fillet.
1. SCALING
Japanese chefs always scale fish. Some fishermen don’t bother to scale when they know they will skin it later. It made sense first. But when I tried to skin it without scaling, I always had some scales left on the sashimi no matter how carefully I tried not to.
The basic fact is you should not wash the fish with fresh water after taking off the head and the guts. Because fresh water absorbs the juice out of fish meat by the osmotic pressure.
So, if you don’t like to leave scales on your food, or if you are cooking for someone, I think you should always scale it.
With small fish, your knife does a fine scaling job. But with a bigger fish, it’s just so easier with the scaler.
2. GILLING AND GUTTING
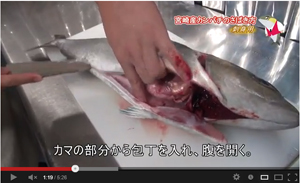
Manuvear your knife around the gills and cut them off of the head and off of lower jaw. Continue to cut open the belly down to the vent.
Sometimes I would use my knife to take off the left over scales at this point. A lot of times the tiny scales are left at the base of the fins, and the knife does a better job at it.
3. RINSE OFF
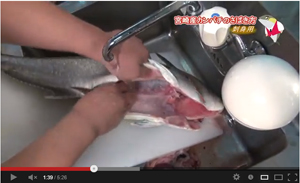
Take the gills and the guts out in a running water. Try to rinse out all the blood. You can use the fresh water up to this point. The fish meat is still dressed with the skin and the peritoneum. The osmotic leak is minimum and it’s rather important to rinse off the blood which is the source of the odor.
Wipe the water off the fish and off the chopping board. No fresh water after this point.
4. CUTTING THE HEAD OFF
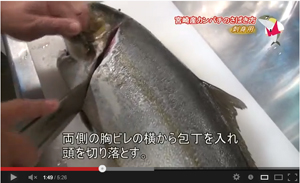
Slice down from the head just behind the gill cover, behind the pectoral fin and to behind the belly fin. Turn it over and slice down the same line on the other side. Cut into the spine at the joint, and it will break apart easily
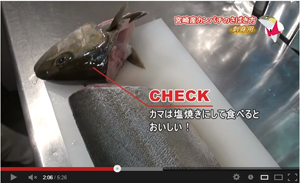
This procedure is to save the head for other cooking. But if you are not saving the head, you can combine Step 2, 3, and 4. You can just cut the head and the belly open, take the head and the guts out, and rinse off.
5. SAVE THE HEAD
You might need to get used to it before enjoy digging into the fish head. But it actually has some most delicious meats left on.
We love it grilled or boiled in soup.
Along the head and in the cheek, the meat is silky smooth. Around the pectoral fin and the chest, the meat is thick and rich. Around the eye socket is the jelly-like protein called DHA. The essential amino acid that human can’t produce and need to take from the foods.
The way to cut the head in half will be shown later.
6. SLICING TO THE SPINE
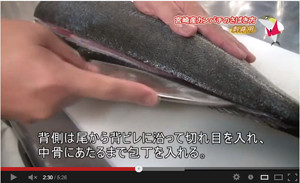
First slice into the skin at the base of the fins. You just need to cut the skin in the first run. Cut deeper into the flesh for the second run, feeling your knife is laying down on the bones. You cut deeper several times until you touch the spine at the tip of your knife
Notice in the video the chef cuts only in pulling actions. No sawing actions which damages the meat. Only pull to cut. It’s important to lift the meat with your left hand to reveal where you are cutting. This will help you finish with a smooth surface on the meat.
Relaxing your arm is the key. Lay your finger tip at the back of the blade for control, but don’t hold your knife too tight. Relax until you feel the weight of your blade. Lay your blade on the bones and try to feel the blade is just cutting the fine fibers which attach the meat to the bones.
7. TAKING FILLET OUT
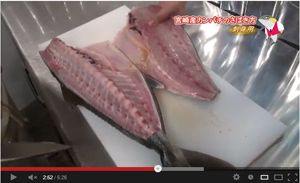
When you have cut to the spin both from the back and from the belly, run your knife on the spine from the tail to the neck, cutting the rib bones and take off the half fillet.
When the rib bone is hard to cut, use the momentum of the knife. And try to hit the rib bones not in a right angle, but a little slanting angle.
Your fingers are always at risks when you force to cut with your muscles.
The same procedures on the other side to get another half fillet.
8. LICING OFF THE RIB BONES
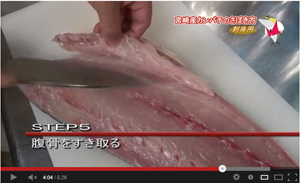
This is the same action as Step 5.
Lay down your knife. Pull to cut little by little. Lift the ribs. Your index finger at the back of the blade to guide the tip of the knife.
If you are good, you can slice off just the thin layer of bones and peritoneum. It’s sad to waste the fatty delicious belly meat.
When you hear “fatty meat” you might become defensive. But fish meat has unsaturated fatty acids, which is totally different from the animal fats. The unsaturated fats can be reproduced for what your body needs at your liver, while the saturated animal fats go straight to your fat stock.
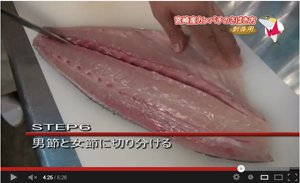
9. SLICING OFF THE MIDDLE LINE
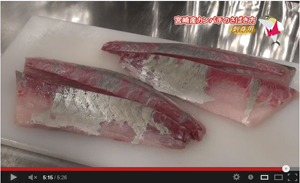
The fish has these thorny bones sticking out from the spine to the side of the body. This is also where the muscle holds a lot of blood so that it’s redish in most fish. You are now looking at 2 halves of fillets, and cutting down to quarters. Just cut into the middle line of the half fillet, taking these bones and redish meats off, and now you have quarters of fillets.
With smaller fish, we stay with half fillets. But we need to tweeze out these thorny bones in the middle line.
10. SKINNING
This is the challenge that tells how skilled the chef is.
Leave the silver on
Skin is several fine layers. It’s the chefs skill to leave the closest layer to the meat. This is where they stock fats just underneath the skin. It’s tasty. And it makes sashimi slices look great.
The layer is silvery in amberjack, yellowtail, and other Jack family. It’s a translucent layer covering the beautiful reddish patterns of the meat in snappers and groupers. Not every professional chefs can skin it with silver on consistently.
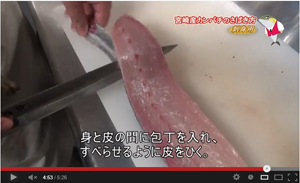
Peel off the skin with your fingers at the tail or at the neck. Put your knife between the skin and the flesh. Lay your knife down on the skin. Hold the skin with your left hand. Use a towel to get a good grip as the skin can be slippery. Keeping your knife steady, horizontally down to the chopping board, pull the skin in a wavy action. Holding steady your knife’s angle is the key.
11. SAKU (fillet bar)
These sashimi size bars of fillets are called “Saku” in Japanese. This time, quarter fillets. Sometimes half fillets, and with big tuna, it can be 1/20 fillet.
You can see beautiful silver on in the video. Even a professional like this man cannot leave the entire silver. It’s such a challenge. You can really go crazy over this. Sometimes I get the perfect silver left on, and I can’t help shouting in triumph in the kitchen, which my wife tells me not to do. Some fish is hard to leave the silver on. Try out your skills!
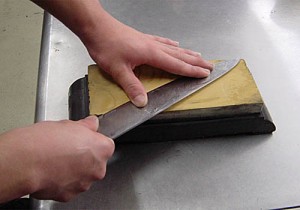
Sharpen your knife everytime
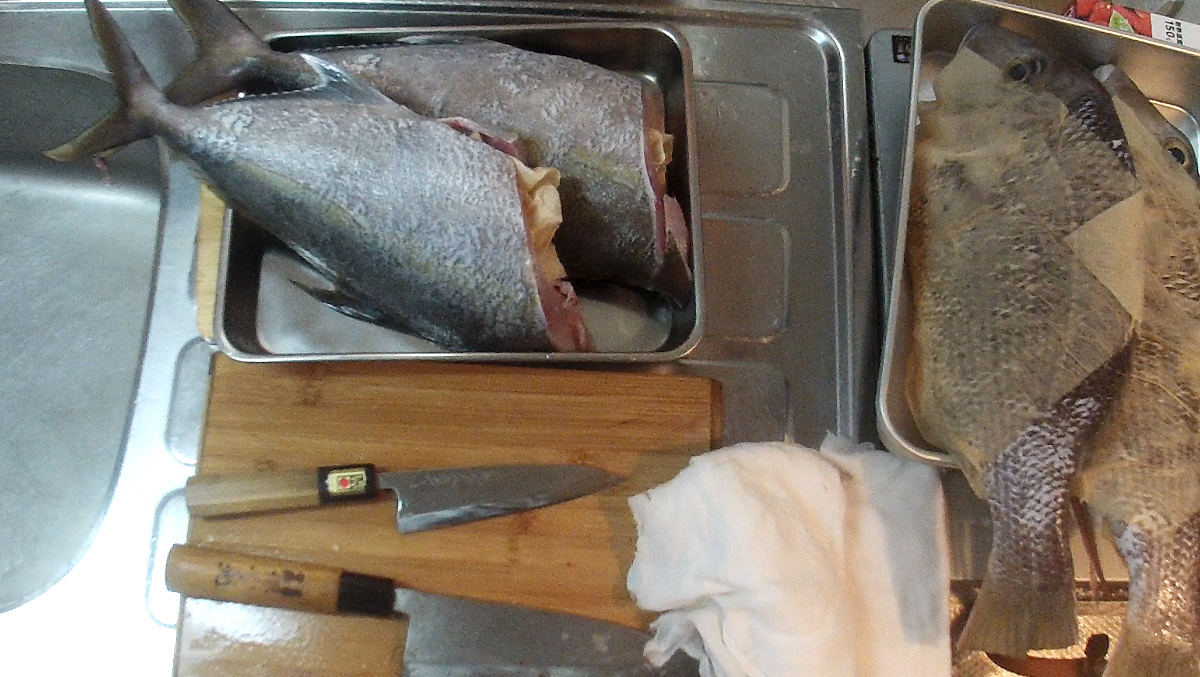
Japanese traditional knives are bladed only on one side. When you hold out the knife with the blade down, the left side is angled and the right side is flat.
Most Japanese families use Western knives now. These Japanese traditional knives are mostly hand-made and expensive. But those who like fresh fish have several kinds of them.
With most fish cutting, we use 2 kinds of knifes.
One is Deba knife, a short thick heavy knife. It cuts through bones with a great momentum. In the video the chefs used it up to Step 7, slicing off the ribs.
The other is Sashimi knife. It’s a long thin knife. This knife follows the finest control and it slices out sashimi in 1 long stroke, which results in a smooth surface of the meat. In the video the chef uses it for skinning.
I always sharpen my knives every time before cutting fish. I don’t know why but I feel sacred in sharpening knives somehow. Maybe it’s a Japanese thing. Or maybe it’s my past life thing.
It just feels good to cut fish with a sharp knife, also it saves much time and energy. I think it’s definitely worth spending time on sharpening them. It’s such a pain to struggle with a dull knife, sawing into the flesh and leaving little chunks of meats around. I would also feel disrespectful to the gift from the mother ocean.
Again, it’s a Japanese thing probably. I don’t force it to anyone.
Cutting the head in half
Let’s take a look at another YouTube on a red snapper with a different chef. The cutting the head in half part starts around 5’10”. But the filleting footage before is also pretty educating.
His cutting actions sometime look like he’s sawing. But he’s not. He only cuts when he pulls the knife. His pushing action is like a guiding action for the next pull to cut.
When you work with the head, the fish can be slippery and you use a great force. So you should use a towel to get a good grip. Having a good grip and a steady set of the head is so important when you do this.
It’s important to cut the middle. If you miss the middle line, you can get stuck in the thick skull. Look straight at the head and find the middle. When the fish has teeth like snappers, start putting your knife on right in between the front teeth.
When you use a Japanese Deba knife to do this, the knife is bladed on one side and it’s easy to miss the middle. You need to watch the angle to stay in the middle.
In cutting down half, you manipulate 2 kinds of forces on the knife. One is to push down the tip. The other is to push down the blade. You repeat these 2 kinds of push-down actions in turns to cut into the head, and when the tip is down and the blade is down, that’s when you cut open the head. Now cut the lower jaw and finish the job.
You need to rinse off the blood well before cooking the head. You can also pour boiling water over the head before cooking to get rid of the odor.
Again, I’d like to emphasize that the head is so delicious! Sometimes I think that picking on the fish head is the reason why we didn’t give up to knives and forks and stayed with the chopsticks!
Related Posts
4 Comments
Leave a Reply Cancel reply
Categories
- 1. SPJ (57)
- 1-1. Principles (9)
- 1-2. Techniques (11)
- 1-3. Setup (17)
- 1-4. FAQ (19)
- 1-5. Tackles (3)
- 1-6. Video Gallery (2)
- 2. Other Offshore Games (5)
- 3. Fishing Report (105)
- 3-1. Totos (25)
- 3-2. Readers (72)
- 4. Fish Cooking (19)
- 4-1. Iki-Jime (3)
- 4-2. The Art of Sashimi (5)
- 4-3. Recipe (7)
- 4-4. Seasoning (3)
- 5. Fishing Charter (6)
- Fish (12)



Nice video demonstration! Cutting the fish for sashimi is really an art, not everybody can do it. It requires a lot of practice and needs guidance from a true expert to perfection.
Just as much as I love my fishing reels, my cooking knives are closely matched. May be it’s an obsession with tools. Hahaha!
🙂
Hi Kitidas.
Thank you for your respect for the Japanese tradition. I wish I could do such a beautiful job like the chef in the video. But I’m happy to see myself now being better at it than before I started fishing.
And I can certainly relate to your obsession with tools! I guess it’s a man thing.
Hi Totos,
I have a question about sashimi. How do you know whether a fish has parasites on it ?
Hi Yani.
Parasites! Wooooo… I guess we can’t get away with this topic, huh?
Parasites are indeed very common in wild fish. Most of them are harmless to humans. Most of them stay in the gills and guts. They can’t survive the heat. They don’t have poison.
But a few stay in the meat, survive until we eat, get away from our chewing process, and stick into our stomach and give us hard time. The notorious is Anisakis. The worm.
When you open the fish, you see them in abdomen. If you do, it’s possible that they are in the meat too. (Other grain like parasites don’t go into the meat usually, but pay attention.) Don’t risk with the worms. Cook the fish. They are harmless when dead. But if you can’t stand it, throw it away. Personally I cook and feed it to my cats.
The experienced fish market buyers in Japan know how to find it by just inspecting the skin. There are faint dots on the skin. One buyer taught me how to find it. It’s hard to explain in words. I still miss it sometimes. The sign is very faint.
It’s common in mackerel, salmon, yellowtail, and squid. You just need to pay attention when you open the fish. Fresh water fish carry a lot of parasites. Our tradition teaches us not to eat sashimi of freshwater fish and brackish water fish.